Week 7
Color Shifts and Low Light

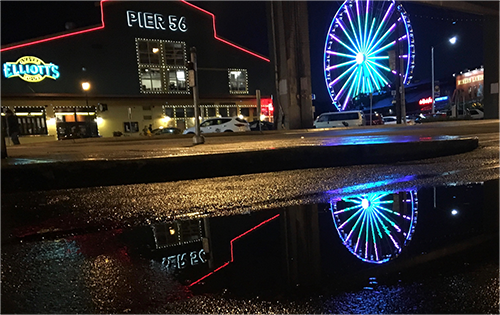
Example of Night Photograph.
Wonderwheel and Pier 56 building at night
with reflection in puddle in downtown Seattle.
Welcome to Week 7. This week, you will explore low light and night photography. You will learn about long exposures to produce photographs that show the world in low light. You may choose to photograph at dusk or dawn, and not when it is pitch black. You could photograph a city skyline, a beach at night, lamp posts on a city street, or houses in a suburb. You will need your tripod to stabilize your camera during the long exposures. It is helpful to use the self-timer with your digital camera to avoid accidental camera movement while pressing the shutter. You can refer to your camera manual to set this up. Review the assignment presentation this week before you begin. Be sure to bracket, exploring different exposure compositions, and to explore white balance adjustments.
Remember, safety first! Do not go anywhere that you feel is unsafe to take photographs. There are lots of safe places you can take photographs, including your own front yard. Public malls are also very good for night photography.
Weekly Objectives
-
Learn proper digital camera operation.
-
Learn color evaluation and color correction techniques.
-
Explore experimental lighting and digital special effects.
-
Learn proper resample techniques.
-
Learn basic digital image enhancements using image editing programs.
-
Present digital photographs using basic design principles.
-
Use the fundamental design elements effectively.
Activities
Readings
-
A Short Course in Digital Photography
-
Chapter 9: Seeing Like a Camera
-
Review the following websites:
Activities
-
Discussion 7
-
Shooting Assignment 7
-
Quiz 7
Night Photography

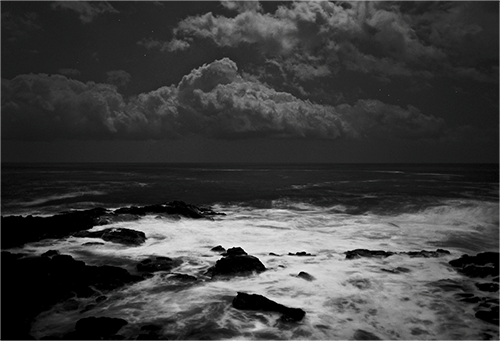
Example of Night Photography.
Black-and-white photograph of Pacific Ocean
in Kailua Kona, Hawaii, at night under full moon.
Successful night photography explores color, contrast, line, and space. Night photography can be of a skyline, a lamp-lit street, a sky with stars, fireworks, or even the front of a house. Regardless of your subject, night photography is an exciting subject that offers lessons in camera mechanics, composition, tripod use, and color. The longer your exposure, the more exciting the colors you can explore. While photographing at night you can shoot anything you like, except for direct auto mode with flash. If you use a flash, use "night portrait mode" or "rear-curtain synch" on the flash and stabilize your camera. You should avoid unintentional camera movement by using a tripod.
Types of Night Photography
There are various types of night photography. Some of them are listed below.
Select each dropdown, or use the Tab and Enter keys to learn more about the different types of night photography.
Transition Period
This is the time after the sun sets, but before it gets dark. Buildings are lit from within with tungsten lights.
Long Exposures with Stars
To shoot, use a very small aperture so that street lights and small secular lights become stars.
Long Exposures with Headlights and Vehicle Lights
To shoot, safely position yourself near or above traffic to compose an image of vehicle trails. Use a tripod. Exposure: Approx. 30 seconds, f/8, 400 ISO, depending on available light. Safety first!
Long Exposures with Camera Movement
To shoot, determine exposure with test shots, and then move the camera during exposure. Practice panning with a subject to find one focal point.
Ghost Images
To shoot, find an area with a dark background and spot lighting, such as a porch light. Use a long exposure, such as 30 sec. Have the subject in the frame for half of the exposure and move out of the frame for the other half.
Light Writing
To shoot, find an area with a dark background and minimal lighting. Use a tripod and long exposure, such as 30 sec. With an LED flashlight pointed toward the camera, draw or outline around subject.
Off Camera Flash
To shoot, use a dark background. Use an off-camera flash, tripod, and long exposure, such as 30 sec. Walk around and pop flash on subject. If you get between the flash and the camera, you will be silhouetted.
You can also download a Word version of Types of Night Photography.
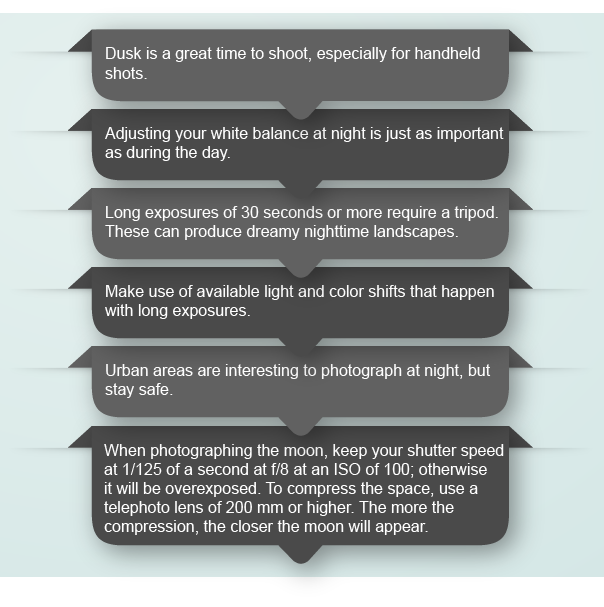
Tips for Night Photography
Review the following night photography tips infograph.

You can also download a Word version of Tips for Night Photography.
Color Shifts: Exploring Low Light Photography
Select the play icon, or use the Enter key to watch the video.
Watch this video to learn the basics of night photography and to see examples of different types of night photography.
Conclusion
This week, you have learned about low light and night photography. You have created four different night or low light images. You have also explored long exposure, white balance, and using your tripod. Next week, you begin your last assignment, exploring emotion in portraiture.